Introduction
Hello everyone. In this article I'll be talking about a series of trials and errors I went through testing out OpenAI's DALLE-E 2 model for image editing. I'll be going through what I did, the final result and I'll be listing the pros and cons of this approach at the end. Let's dive in
OpenAI Image Editing
So to keep it short, OpenAI has this API that allows us to upload our own images and a prompt stating exactly what we want to achieve edit wise. Then what happens is OpenAI takes our image and applies the prompt (or at least I thought it did that lol) resulting in an edited image of what we wanted.
If we look at the documentation from the OpenAI website we'll see the following example
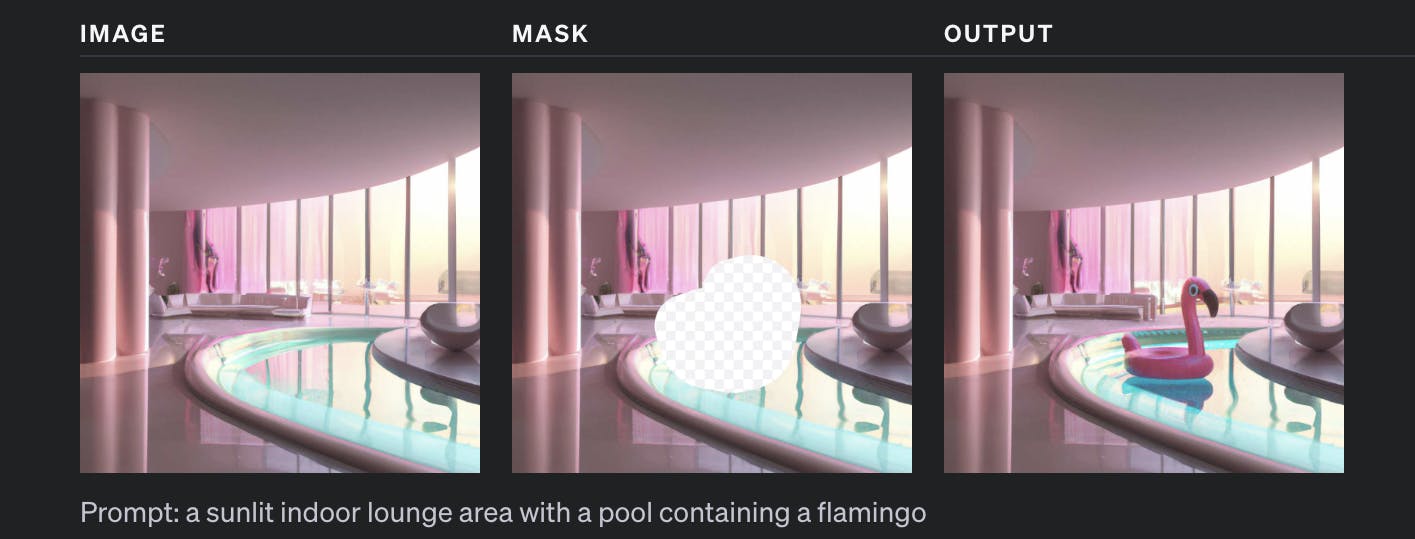
It takes 3 main inputs:
The original image
A duplicate of the original image but with a transparent mask specified in the area that you want edited. (Masking using anything other than a white fill won't work, for example a black mask won't work it HAS to be white)
A prompt, They stated in the documentation that it has to describe the image itself not the edited piece (masked part) only. This was painful to say the least.
Then what it would do was return a URL for the edited image(s).
So as any curious person would do, I thought I'd give it a go.
My Walkthrough
I had this picture of myself below. The picture was missing something so as I started thinking I realized what was missing.
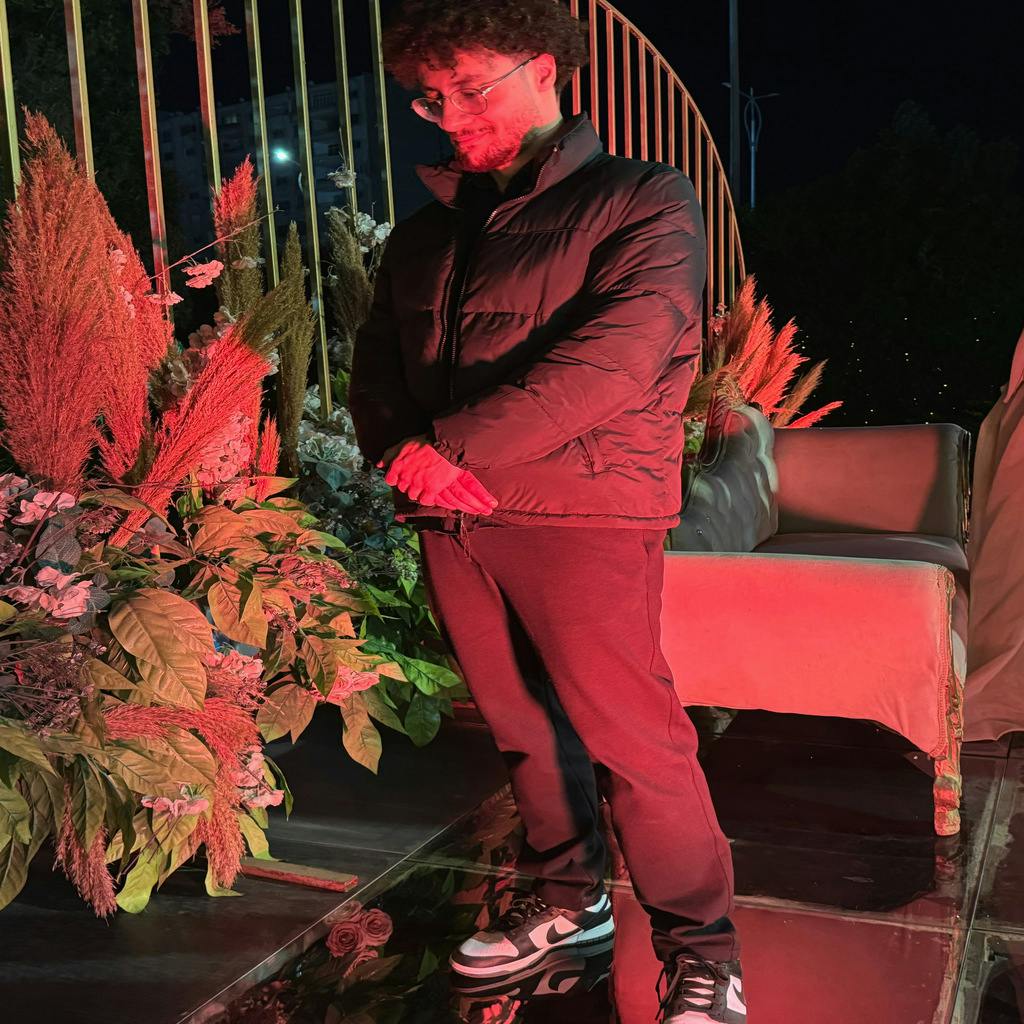
It was missing a gravestone with the words 'EGP' written on it. Basically if you're not from Egypt or you've been living under a rock the egyptian currency (not even worth using caps lock for it) got devaluated again a few days ago making a single US dollar worth almost 50 egyptian pounds.
So that's exactly what I wanted to add to this image. I'll leave you to what I did (stay tuned for the result at the end)
Writing the code
First thing I did was copy paste the code from the OpenAI documentation
from openai import OpenAI
client = OpenAI(api_key="get ur api key")

response = client.images.edit(
  model="dall-e-2",
  image=open("test_image.png", "rb"),
  mask=open("mask.png", "rb"),
  prompt="<prompts are listed below>",
  n=1,
  size="1024x1024"
)
image_url = response.data[0].url
I had the original image shown above and the masked image where I masked the area I was looking at.
I spent almost 3 hours, tried more than 60 attempts using different prompts to get this working and I would've never imagined it would be this hard. Bare in mind this isn't free I had to put in 5$ for this.
Prompting
Some of the prompts I wrote were as follows;
A person standing infront of a headstone, the headstone has the words 'RIP EGYPTIAN CURRENCY' on it
A person standing in front of a headstone, the headstone has the word 'RIP EGP' on it
A person standing in front of a tombstone, the tombstone has the word 'EGP' on it
A person standing in front of a GraveStone, the GraveStone has the word 'EGP' on it, please don't mess this up
A man standing in front of a gravestone with the letters 'E','G',P' written on it. The letters are in the order specified
I tried more than 30 other prompts and what I realized was it really has trouble writing on the gravestone. It's really good at editing a gravestone in but ends up writing gibberish on it. Below are some of the funniest outputs that I got
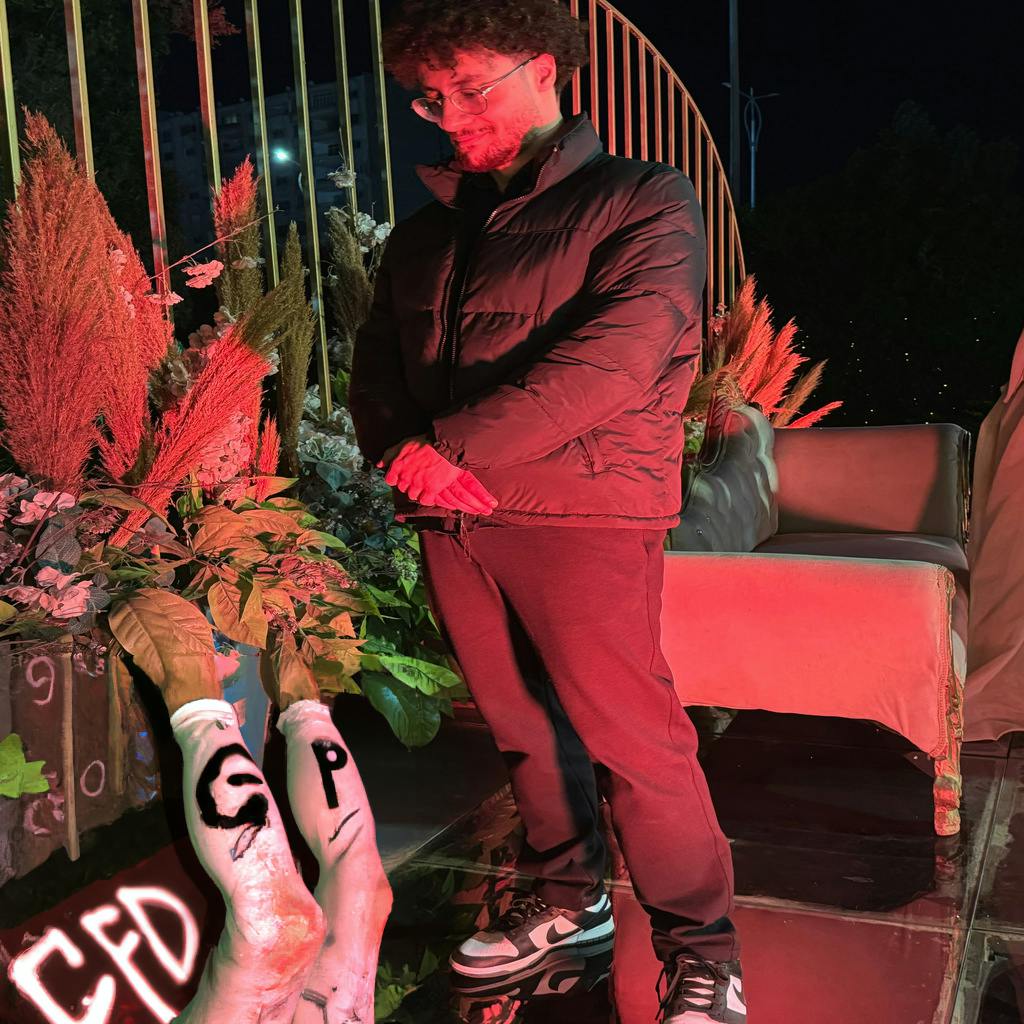
Are these.. legs?????

The one above's edit is really good. Idk what the text means though.
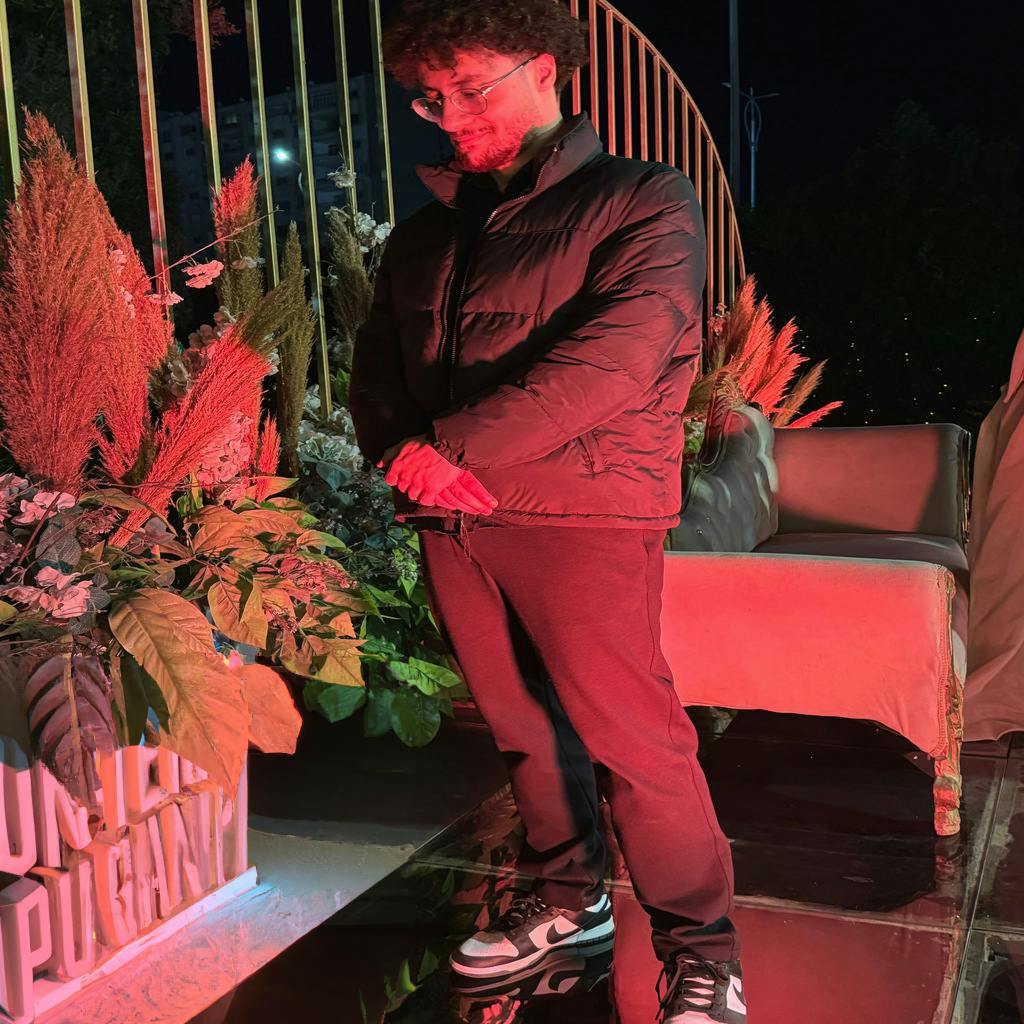
The one above gives me temple runner vibes
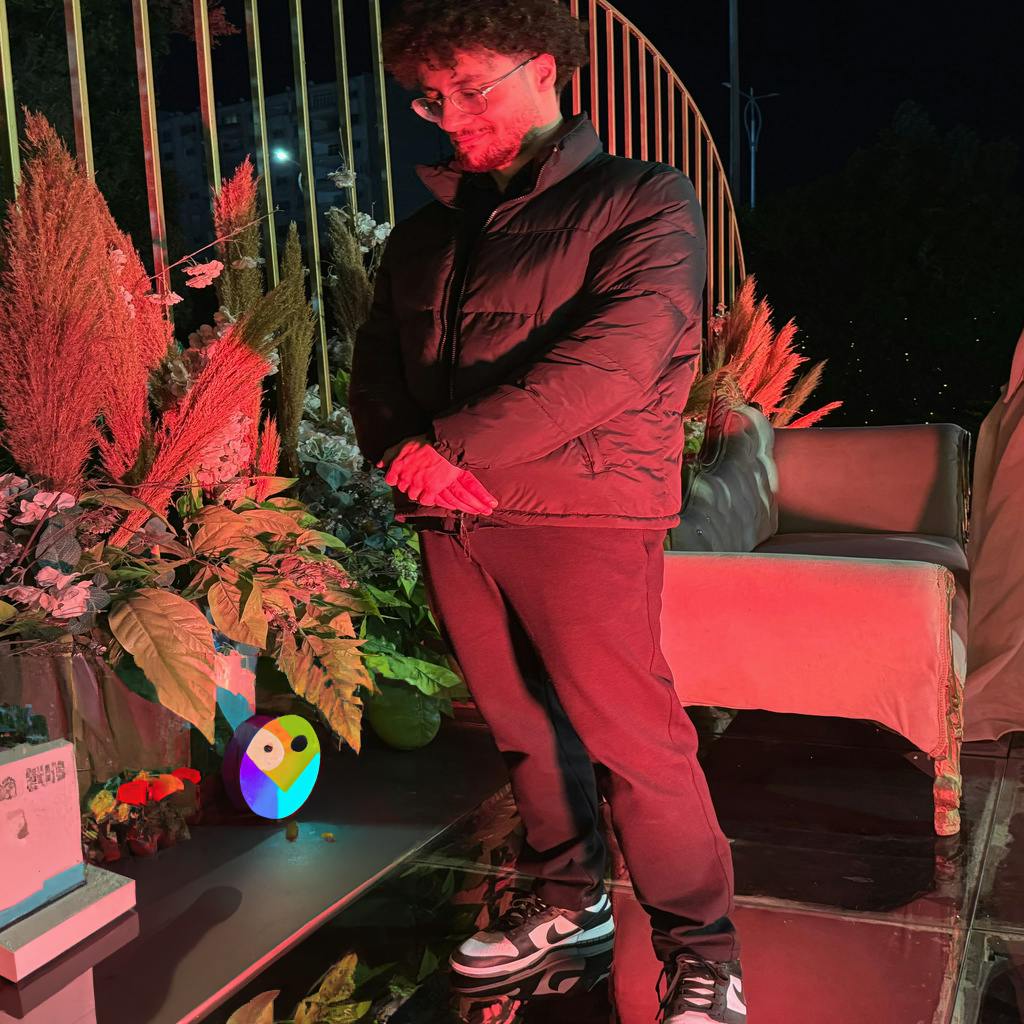
What exactly did I write for it to give me a broken disco ball?
Final output & Summary
I guess after all these attempts I got lucky with one that looks like this
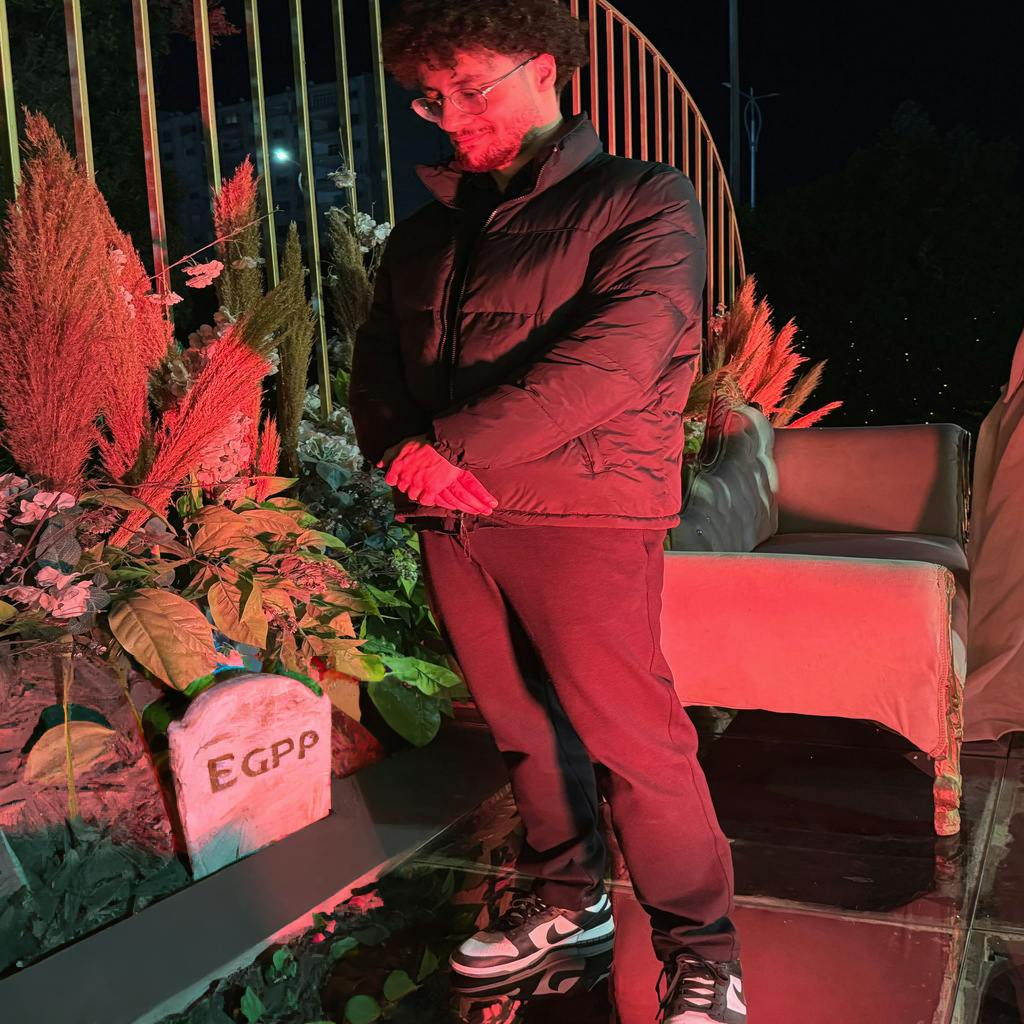
I guess the trial and error time is equivalent to learning Adobe Photoshop from scratch but at least we got something we can work with.
To summarize maybe it wasn't the best pick for my case or what I wanted to do with it but I guess it might be useful in other cases. But it has trouble understanding specifics when you prompt it to do something like write or engrave. Maybe in a few years when it's better I'll be able to recreate this with a bigger grave let's see.
